
The Death Guard are a fun army to paint, offering not just large, detailed models but a ton of different textures and colors to play with. You can do a lot with them and even if you go with the basic green there's a ton of ways to work in more colors via things like mushrooms, clouds of noxious gas, and pus-filled buboes.
My own Death Guard scheme hews relatively closely to the Games Workshop standard scheme, but with a few twists I've developed as part of a method to paint the models faster. This method is partly designed to help make batch painting easier, and partly designed to create solid results in a short time.
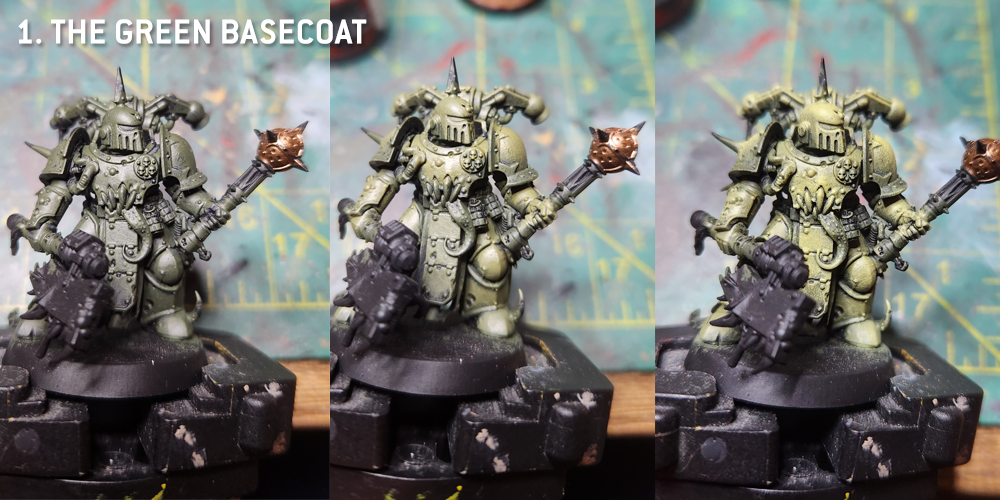
Step 1: The Green Basecoat
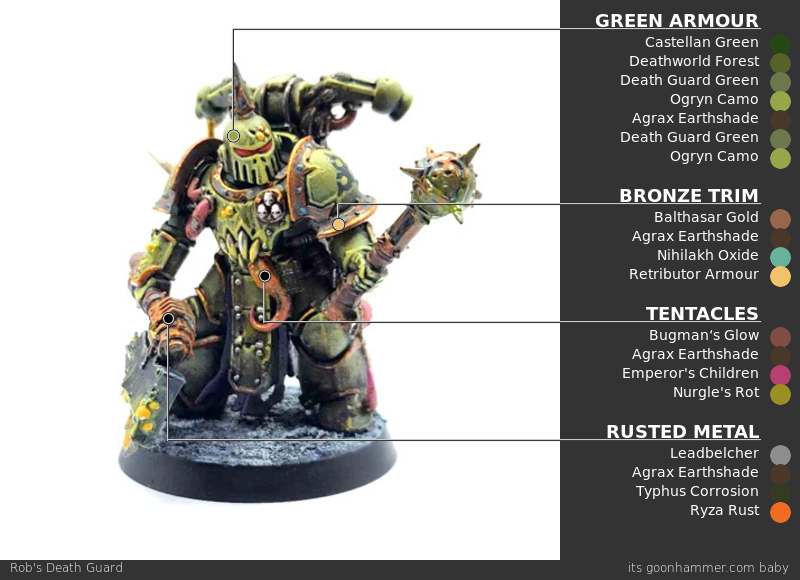
I prime my Death Guard black, then start by laying down the model's green basecoat. This is a four-step process (so, sub-steps I guess). I start by painting the model with a coat of Castellan Green, after which I do a highlight layer of Death World Forest and another of Death Guard Green. In the final step, I drybrush the model with Ogryn Camo. This is all going to be hit with wash later, but it's good to lay down the color depth now.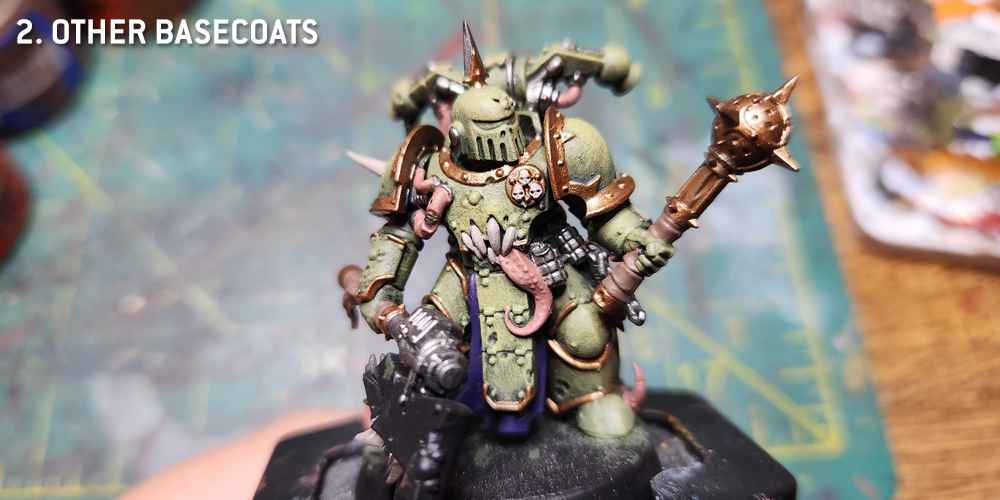
Step 2: The Other Basecoats
One fun thing about this process is that the model goes from 50% to 100% completion very quickly. At this next step I lay down all of the other basecoat colors. Nothing gets shaded at this point, it's just the base color. Here's the quick rundown of what's what:- Armor Trim: Balthasar Gold
- Tubes, Tentacles, and Tongues: Bugman's Glow
- Metal Bits: Leadbelcher
- Wood Bits: Mournfang Brown
- Leather Bits: Gorthor Brown
- Tabard: Naggaroth Night
- Bone, horns, and skulls: Rakarth Flesh
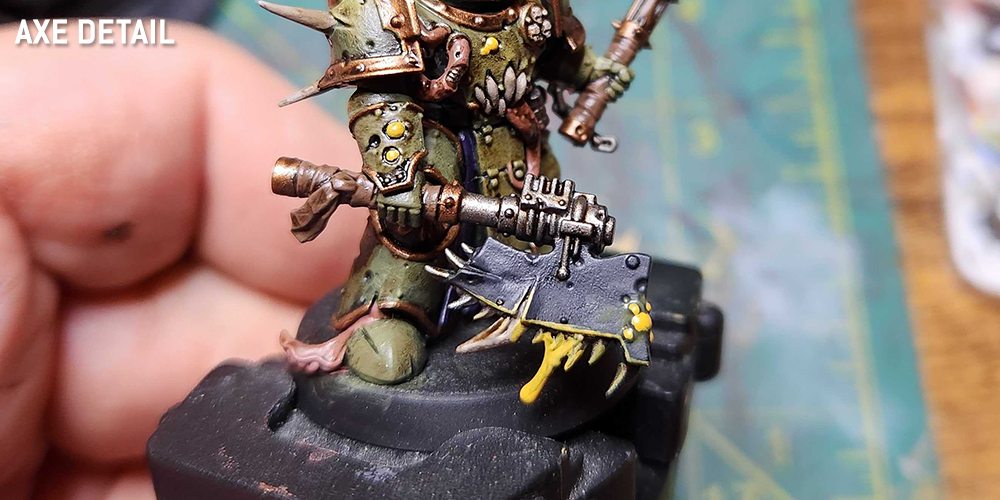
For the Axe head and other dark bits I paint them Abaddon Black, then highlight with Corvus Black. Finally there's the buboes, which I paint with Averland Sunset and highlight a small amount with Flash Gitz Yellow. We're going to hit that part of the model later as well.
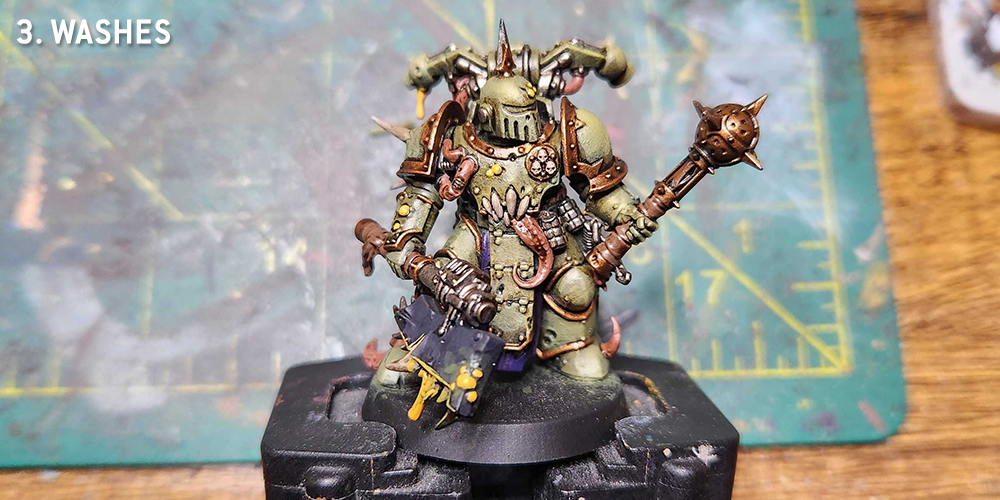
Step 3: Washes
Now it's time for the only bath this guy is ever going to take. With all the basecoats down I wash the model pretty liberally in Agrax Earthshade. I especially want to get any cracks and crevices on the green armor plating, and I want to apply it liberally to the armor trim and horns.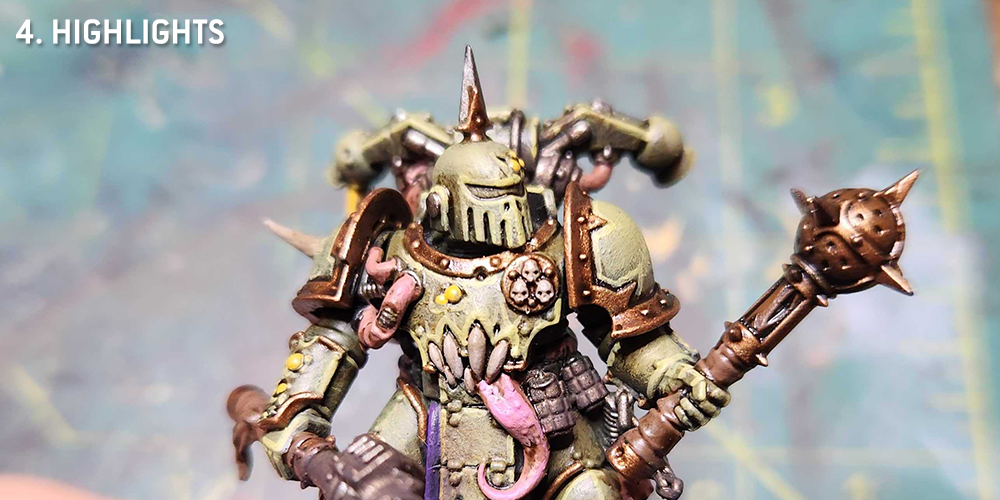
Step 4: Highlights
Once the washes are done I go back through with some Death Guard Green for raised areas that are a bit too stained with wash, and then using a smaller brush I edge highlight the mode with Ogryn Camo. This gives the model some really sharp highlights and will help it pop later. I also highlight the cables with Bugman's Glow and the tongues/fleshy bits with a mix of Bugman's Glow and Emperor's Children to make them pop.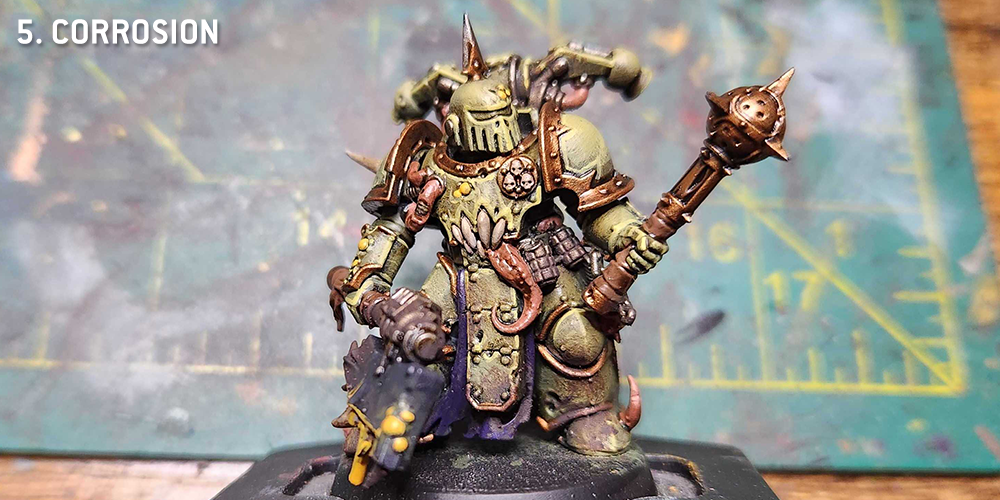
Step 5: Corrosion & Weathering
Now it's time for the weathering. I more or less sponge Typhus Corrosion onto the model around the legs and on any exposed Leadbelcher parts. I want to generally keep more of the corrosion toward the bottom of the model. Either way it'll look stained and crustier.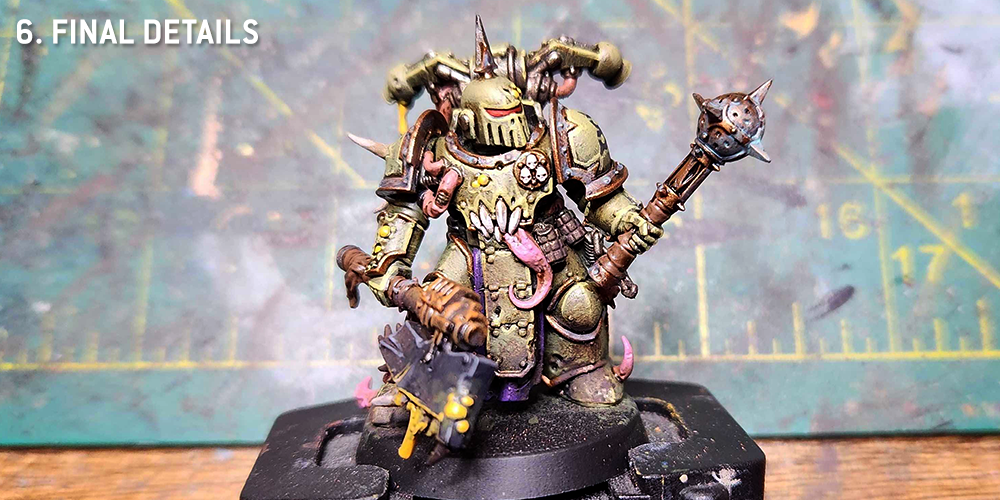
Step 6: Final Details
There's a lot to pick out at this stage, but none of it's too complicated. Let's run through the elements and how they're handled:- Tentacles and Tongues: Highlight with Emperor's Children, doing a blend with Bugman's Glow. These will later get slathered in Nurgle's Rot. The power cabling I will also hit with Bugman's Glow again as a highlight. The pink in these spots really stands out and looks appropriately gross against the green, and it'll take a sickly color if I hit it with Nurgle's Rot later that can be effective, but will make the colors more muted.
- Rusted Metal: I'll drybrush the Typhus Corrosion spots with Ryza Rust, then if it's a plague weapon I'll cover it in Nurgle's Rot. later on.
- Teeth and Horns: I highlight these first with Rakarth Flesh, then later with Reaper Polished Bone.
- Gold/Bronze Trim and parts: This is a two-stage process. First is was parts of the metal - usually the areas around rivets or anywhere water might pool on the surface - with Nihilakh Oxide, going light on the paint here (less is more). Then I'll come back and hit the raised edges of the trim with a small amount of Retributor Armour to have a few spots of classic gold poking through.
- Buboes: I put a dot of Flash Gitz Yellow on these, then cover them in Nurgle's Rot so they take on a slimy, green look.
- Visor: Not all Death Guard models have this but when they do I paint the visor with Mephiston Red and then highlight that with Evil Sunz Scarlet.
This article is part of a larger series on how to paint the Death Guard. To return to the parent article, click this link.